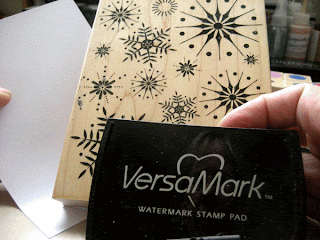
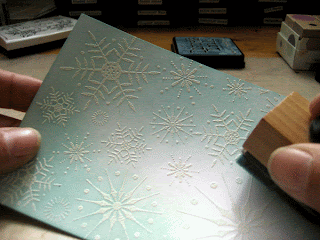
Collect what you need for embossing beforehand. Embossing powder, versamark (or another brand embossing ink), paper. This will prevent madly scrambling for supplies after stamping with versamark! (yes, been there, done that!)
Emboss the eerste stempel met witte embossing poeder.
Emboss the first stamp with white embossing powder.
Breng de eerste laag inkt aan. Begin met de lichtste kleur die je voor je kaart wilt gebruiken.
Apply first layer of ink. start with the lightest color you want to use on your card.
Droog de inkt en stempel de tweede stempel met versamark.
Dry the ink and stamp second stamp with versamark.
Gebruik transparante embossing poeder deze keer.
This time use transparant embossing powder and use heattool to set it.
Breng de tweede laag inkt aan.
Apply second layer of ink.
Het resultaat zou er zo uit moeten zien. Witte sneeuwvlokken en lichte punten waar de eerste laag inkt door de transparante embossing heen zichtbaar is.
The end result should look like this. White snowflakes and the spots show the first lighter layer of ink through the transparant embossing.
Omdat het vrij druk is geworden heb ik het in vierkantjes gesneden en de reststukjes bewaard.
Because it is quite a busy result I cut it into squares and a few rest pieces.
Vergeet niet om de randjes te inkten! Dit geeft een mooier afgewerkte indruk.
Do not forget to ink the edges! These little details make a good card look better.
Arrangeer de stukjes and plak 3D-blokjes onder éém ervan.
Assemble your pattern and raise one of the pieces with foam blocks.
Plak de onderdelen op de kaart.
Adhere to card and trim edges
Laatste stap: voeg extraatjes toe. Ik heb een paar ijs-blauwe blingsteentjes op de sneeuwvlokken geplakt en een tekst eronder gestempeld.Wat ik het mooiste vind van deze kaart is de tegenstelling tussen het drukke stempelen en de eenvoudige, strakke layout.
Final step: add embellishments. I used ice-blue gems and a sentiment.
What I like most about this card is the contrast. The stamping is wild and eratic (like snowflake often are!) but the card layout is straight and simple.


Love it, and thanks for the lesson!
BeantwoordenVerwijderen